
My single layer braided fleece blanket tutorial from last year has been so popular that I thought I'd try a new variation. The biggest question I get asked about my first tutorial is if it works with two layers of fleece. After a bit of experimenting, I'm happy to say that it does!
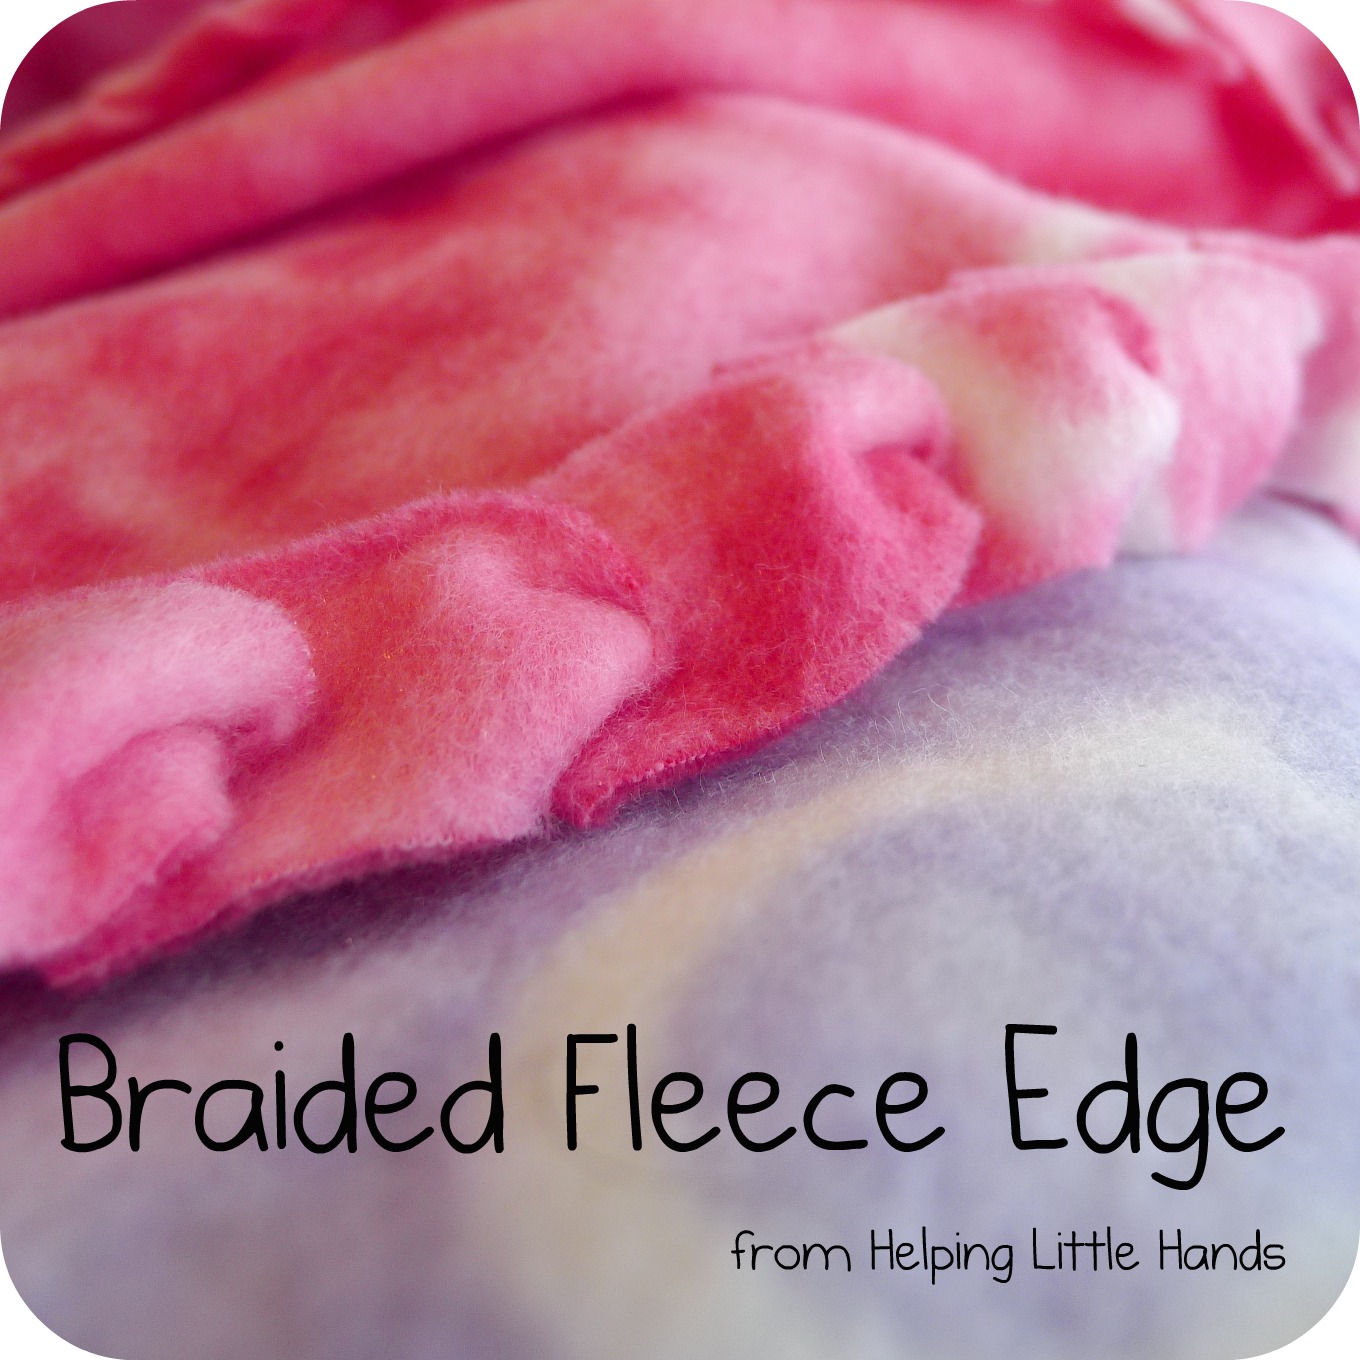
And so I present to you...The Double Layered "Braided" Fleece Blanket.

The main advantages to a braided edge on a fleece blankets are:
- The edge looks pretty classy.
- There are no uncomfortable knots to lay on.
- Less fleece is lost to the fringe, so you end up with a bigger blanket
For each blanket, I started out with 2 pieces of fleece that were each 1 1/2 yards. (Fleece usually comes 60 inches wide on the bolt from the fabric store.) I layered them on top of each other with the sides out that I wanted to show.

Then I trimmed off the salvages (the part on the edges of the fabric with the printing/weird edge.)

Edited to Add: I neglected to mention you'll need to cut a 2'' square out of each corner. (This would also happen naturally as you cut your fringe. This picture is from doing this for a single layered blanket, but the process is the same for a double layered one.

My favorite way to mark the fringe is using painter's masking tape (available at any hardware store). Whether I'm cutting the fringe with scissors or a rotary cutter, the firmness of the tape helps the scissors stop and keeps the fringe even. The painter's tape is also not very sticky and comes off easily. I tried cutting the fringe 2 inches deep and 1 1/2 inches deep. They both work well, but I prefer the 1 1/2 inches.

Once the fringe is cut, I folded each fringe a little closer to the end than half-way, so I could cut a slit. I did this through both layer at once.
It should be about this size.

Now you're ready for the fun part. You can start anywhere, but I like to start in the middle of one of the sides. Choose a fringe to start with. I used a bent paperclip. A crochet hook will work great too...I just don't have one that's big enough. Stick the paperclip through the slit of your first fringe.

Now stick the paperclip through the slit of the fringe underneath...

So that it "hooks" the second fringe and you can pull it through the first fringe.


Once you've pulled it all the way through, your paperclip (or crochet hook) should already be through the slit of the second fringe, and you move on to the next fringe on the top. Put the your paperclip through the next slit to hook the next fringe. I always moved from right to left on my blanket, but if you're left handed, it might be easier to work left to right.
The most important thing is to ALWAYS alternate between using a fringe on the top and a fringe from the bottom. Pretty soon it will start looking like this.
When you get to the corners, you just keep doing the same thing. It will naturally curve around the corner.


And use them to tie a knot around the first fringe. Make sure to do at least a double knot...triple if the fringe is long enough. That will be the only knot on your entire blanket.

And that's it! The look of your braid will vary depending on the fabrics you've chosen...and will even vary on the same blanket, if you've chosen a print.
Click on an image to see a larger version.


The two most common questions I get asked about this are:
Will the edge unravel? No! Each fringe is pulled through the fringe next to it, and so as long as you secure the last fringe by knotting it will or sewing it, then the "braid" cannot come undone. Should the knot ever come undone, it could unravel slowly...but you'd notice that and just reknot it. I've washed our blankets many times and have never had the fringe come undone at all. (We also have some of the traditional knotted blanket that we were given by others, and some of those knots have come undone and had to be retied.)
This method also works for a Braided Fleece Scarf. Tutorial here...

Or if you're looking for something a little different to do with fleece, you might also like the fleece fitted sheet, I made for my son last year. I'm in the process of making another one for my daughter this year, so check back soon for a full tutorial for making one.

Please show my sponsors some love...

Polly, these are great. The kids will love them.
ReplyDeleteWhat a smart way to finish the edges, I love it!
ReplyDeleteFound you via link party, thanks for sharing. :o)
Happy Holidays!
That's a neat trick. I would love for you to share at http://eyehearttoday.blogspot.com/2011/11/anything-goes-at-eye-heart-3.html
ReplyDeleteWhat a great improvement on the old knotted method. I'll give it a try. Thanks!
ReplyDelete-Holly
That's a great idea, thanks!
ReplyDeleteI love that edge! It looks much nicer. :)
ReplyDeleteI'd love for you to link up and share: http://tutusandteaparties.blogspot.com/2011/12/pinteresting-link-party-week-sixteen.html
do you cut the corners out, the same way you do on the tie blankets?
ReplyDelete@ Anonymous: Yes, you do need to cut the corners out. If you have any other questions, you might find it easier to email me, so that I can reply to you directly.
ReplyDeleteHow do you make a tie knot blanket with ultra cuddle fabric?
DeleteI love these!!! --- would LOVE for you to link up to my SPEND LESS.GIVE MORE Holiday Party --- I think the blankets would make perfect gifts for kiddos & grown ups alike ;)
ReplyDeleteLauren
www.SummitSTreetJoy.com
Thank you! I used your tutorial last night. I posted pictures of my creation here: http://craftymomsshare.blogspot.com/2011/12/christmas-cards-and-christmas-gifts.html.
ReplyDeleteThat blanket is SUCH a great idea! Thank you for the tutorial! I was just stopping by, I will probably subscribe lol
ReplyDeletevery neat :) will have to try this someday, perfect for the weather we're getting these days
ReplyDeleteWhat a great idea! Thanks for sharing :)
ReplyDeleteHave you found that the braids come apart at all after washing or just exessive use?
ReplyDeletei am also curious about the edges after washing and use.....
ReplyDeleteI have been determined to use up fabrics that have been sitting - lots of flannels and fleece. Typed in a search for fleece tutorials and came across your braided blanket an hour ago and I'm almost finished with a small blanket. Very clever edge. All the little ones I know will be getting a blanket until I run out of fleece. Thank you for sharing.
ReplyDeleteI don't know what I did wrong, but the finished blanket almost mimics a fitted sheet. Is there something that I am doing wrong?
ReplyDeleteThank you so much for your tutorial! The braided edge technique you came up with is so classy looking. I also like that there are no uncomfortable knots to lay on, and you get more blanket out of the material. Thanks for sharing this fabulous idea!
ReplyDeleteI'm excited to try this! I'm making EIGHT fleece no-sew blankets for Christmas presents (I'm starting early!!!) I'd love to give this type a try, over time have you found that the braided edges stay together well through the wash???
ReplyDeleteWe donated all the double layer blankets we made...but we have several single layer blankets and the edges are as good as new. The process is the same for the double layer. There's really no way for them to come apart unless the slits you cut to pull the next one through rip...which they won't unless you cut them too close to the edge.
DeleteThat is a very nice looking blanket you got there! :)
ReplyDeleteCongrats
I love this idea and am wondering if you have ever tried stuffing the blanket to make a pet bed. Seems like this should work and the pets wouldn't be as tempted to play with the edges since it's not fringe. Would be a good scout project to do for animal shelters. Thank you!
ReplyDeleteThanks, that's a great idea. I never would have thought of that since we don't have pets, but you are so right! Thanks for sharing.
DeleteIm actually making all 4 of my dogs pet beds like this tonight. I stuff them with old tshirtd so when their dirty I can just put it all into the washer. With my left over fleece im going to donate pet beds to the local shelter. Great edge and tute
DeleteI love the look of these blankets! I have a question. When I make the knot version of the fleece blankets I sew a line around the edge to make it a little more permanent. The knots are on the outside of the line. Would it be a good idea to do that with this version?
ReplyDeleteIt would work great to sew a line around the inside of the fringe, but it will be permanent without it as well.
Deletelove this idea thanks for sharing it with us. I am going to make a bunch of double sided blankets this year for my family for Christmas. It is a great gift that keeps on giving..
ReplyDeleteI am so excited for this new method .... the kids in my family are always asking me to make fleece no sew ... they're really going to love these .... Thank you so much for the very well illustrated instructions.
ReplyDeleteI found this on pinterest and made one for my son yesterday! He chose pirate-themed fleece, which I paired with a coordinating solid. It looks AWESOME! It took me 2 hours and the materials were $13. My 3 year old is thrilled and everyone in my family is getting one of these for Christmas. Thank you for sharing!
ReplyDeleteI pinned the finished product with credit to you: http://pinterest.com/pin/27584616438919949/
I absolutely love this. I have a new grand baby coming in February. Guess what she's getting from Grandma.
ReplyDeleteWould a crochet hook work as well as the paper clip? I'm thinking the longer handle of the crochet hook would make it easier to manipulate.
ReplyDeleteYes, a crochet hook will work as well...I just didn't have one.
DeleteGreat instructions! My first time and it came out beautifully! Thank you!!
ReplyDeleteHow much do you cut out on the corners? I have about a dozen of these I need to make and it would be great not to have to tie all those knots. Thank you for sharing.
ReplyDeleteYou will want to cut a square as deep as your fringe.
Deletei just found your instructions for the two layered fleece blanket. thanks for explaining and the pictures...sounds and looks easy enough for me. i have two blankets waiting on me to get started. thanks agin and Happy Holidays!
ReplyDeleteLove your site!!! Rhonda
ReplyDeleteLove this way of doing the blanket , I'm anxious to try it ,but I did want to ask if you can tell me the scissors you are using in the pictures ? They look like they would work a lot better than my normal scissors.
ReplyDeleteLisa, it's a pair of scissors that came with a Gingher set I was given years ago. The tip on them is sharper than my other scissors so that's why I was using them. (I don't think the tip is meant to be sharper...it's just that my other scissors are getting a little dull at the tips.) I never knew why they were such a funny shape. I just now looked them up and it turns out they're called applique scissors. I do applique all the time, but didn't know these scissors are better for it. You can see more info about them here http://www.gingher.com/product/6-knife-edge-applique-chrome-finish/90/
DeleteI USED THIS AT A SENIOR CENTER TO MAKE LAP COVERS FOR WAITING IN THE COLD FOR TRANSPORTATION BUS.THEY LOVE THEM ALSO A GOOD IDEA FOR WHEELCHAIR BOUND PATIENTS.
ReplyDeleteWhat kind of scissors are you using in the above pictures ?
ReplyDeleteisa, it's a pair of scissors that came with a Gingher set I was given years ago. The tip on them is sharper than my other scissors so that's why I was using them. (I don't think the tip is meant to be sharper...it's just that my other scissors are getting a little dull at the tips.) I never knew why they were such a funny shape. I just now looked them up and it turns out they're called applique scissors. I do applique all the time, but didn't know these scissors are better for it. You can see more info about them here http://www.gingher.com/product/6-knife-edge-applique-chrome-finish/90/
DeleteOh me oh my! This is amazing! I think I will be making fleece blankets now! Thank you so much! :)
ReplyDeleteI'm fairly new to this domesticated kind of thing so this might seem like a silly question. I noticed in one to the comments they mentioned "cutting out the corners"...can you expand on that. We are economizing Christmas this year and I think it might be fun to try and make these for my boys but I'm starting from square one...I know nothing...Thanks for your help :)
ReplyDeleteMade one tonight! Thanks so much for posting this, it turned out beautiful!
ReplyDeleteCould you use a silk fabric instead of another fleece?
ReplyDeleteNo, I don't believe silk will work. Silk fabric will unravel whereas you can have raw edges exposed with the fleece.
DeleteI made this type of blanket for my kids toys year as Christmas presents, my husband now wants one for our king size bed. Do you know of anywhere i can purchase fleece in a width more than 60"?
DeleteMichelle, I've never heard of fleece coming in anything wider than 60 inches. However, you could sew to pieces together and then do the fringe around the edges.
DeleteI would love to try to make one of these for my little brother and my oldest niece for Christmas. I understood everything till I started reading the comments and you mentioned that you had to cut the corners. I'm new to doin this kind of stuff and am a little confused because you didn't show that in the tutorial so I wouldn't know how to go about doing it correctly.
ReplyDeleteHi Melissa...yeah, I really need to go back and ad a picture of that. There's a picture of the cut out corner in my tutorial for single layered blankets that you can find here http://helpinglittlehands.blogspot.com/2010/12/braided-fleece-blankets-tutorial.html That part works the same for the single and double layered blankets. Let me know if you have any other questions.
DeleteI need help I'm using regular fabric and flee e and it falling apart! Please help
ReplyDeleteAshley...sorry I couldn't email you, but your email is not attached to your blogger profile. Regular fabric will not work for this. It must be two layers of fleece...or if you just have one layer of fleece, that will work too. You can see my tutorial for a single layer blanket here (http://helpinglittlehands.blogspot.com/2010/12/braided-fleece-blankets-tutorial.html)
DeleteMine looks like a fitted sheet... Should I have cut the strips longer?
ReplyDeleteMine is usually a little tight at first, but if you just pull on it, then it stretches a bit and is fine. If yours is more curled up than that...I'm not really sure what would be wrong, but it might be that you need to cut the strips a little longer.
DeleteYay! This solved a problem that I'd been having with a blanket I got from my "Heart Sister" at church. She made me a tie edge blanket for Christmas, but she didn't really measure and cut evenly, so it has been coming untied. I decided to try your method here. It took some doing, but it worked and now my blanket doesn't come apart anymore!
ReplyDeleteThank you! I will try this when the next time I make one of these kinds of blankets, probably for my new niece.
I have a question......how could i do this as a patchwork no sew blanket.........i have seen these and they ate reall cute but all are done the knotted way.........i think as a patch work they would be so much cuter & no knots would be a plus considering comfyness ;)
ReplyDeletePersonally, I've never tried to make a patchwork fleece blanket, so I'm not sure how it would work. I did have one reader a while ago who said they had been able to do it successfully. I think you'd definitely want to keep the fringe on the shorter side for doing patchwork.
DeleteI've never seen this technique before. I used it then stuffed it to make a dog bed.
ReplyDeleteI am so excited to try this! I recently purchased some fleece to make a blanket as a gift, but it was the last of the fabric they had in that pattern, so I wasn't able.to get as much as I wanted and was afraid the blanket would be too small since you lose so much fabric doing the tieway! Can't wait to try this out, thanks for the great post!
ReplyDeleteI got the fabric to make 5 tied ones for my sons for this coming Christmas. Well I started them this week. I need to split the last tie and finish it like you said to. However as I was cutting the second one today, I accidentally cut through both layers on one tie. Should I just sew the end closed. That is what I am thinking I should do. Leaving one to be my last one I would only need to sew one. Thank you for something I know my sons will love. 26, 23, 20, 17, & 15. the older two have or had one tied. I had learned two ways to tie them. I like this better.
ReplyDeleteYes, sewing the last bit together should work just fine. Good luck!
DeleteThanks very much! Just used your directions to make a 3 yd long Batman blanket for a friend, and it turned out perfectly.
ReplyDeleteTwo done three to go. Just tricky finding time to work when the two living here will not see me doing it. I have had to start pack up out of sight move to another part of the house with both of these when I expected to have the house to myself for many hours every time I started. sigh two closer that I was when I purchased the material. I do 2.5 yards of 60" wide, for the three chose yet my sons are all taller than my average height. Two I did buy the pre packaged for were only 60" x 72". que sera, sera.
ReplyDeleteOMG, I made so may of these for my friends and I spent the whole November and December sitting on the floor and I made nine 6 foot long blankets for almost every one I could think of that would use it! I spent so much time working on them that I even missed a party that I had been waiting for for an entire year! I guess it was worth it though because everyone said that the blankets were like magic and they fell asleep for hours until their mom finally woke them up. I was exhausting, but hey, they were six feet long!
ReplyDeleteI have had all five finished for a while now. They are for this Christmas, yet my oldest will be celebrating in September when he returns across the Atlantic Ocean for a short time. Since I went back to college last month I would have never had time to work on them if I had not started when I did. Now I need to finish the crocheted project I decided to tackle for him.
ReplyDeleteWill this fall apart when washed and dried??
ReplyDeleteNope. It holds together really well.
DeleteWhen I make these types of blankets, I pull the two sides' fringe together like "praying hands" (sorry, that is the best visual I can come up with) and then do each layer individually so you end up doing the edge twice. So, if you are doing a blue and yellow blanket, one side is yellow with the blue border and the other side is blue with the yellow border. I will have to try it this way as well!
ReplyDeleteDo you think it would work using one layer of fleece and one layer or regular fabric?
ReplyDeleteNo, I don't believe that would work. This will only work with fabric that doesn't fray and has the same amount of slight stretch to it...as far as I know, the only fabric that has those properties is fleece. But if you want a lighter blanket, this definitely works with just a single layer of fleece.
DeleteHi Polly, Wonder if I could get your directions on how to make the fleece sheet you made for your son? Thanks
ReplyDeleteSorry, Irene. I didn't have a way to email you since your email address was not connected to your comment. You can find the directions for the fleece sheet here http://www.piecesbypolly.com/2011/12/tutorial-fleece-fitted-toddler-or-crib.html
ReplyDeleteHi Polly, I discovered your site a year ago when I started doing no-sews, and I love the braided version. I made my first no-sew blanket following your instructions and it turned out beautifully. I work at a fabric store and I recommend your site to all my customers. Thanks so much for posting easy to following instructions they are greatly appreciated.
ReplyDeleteThese are wonderful. I have done dozens of the traditional tied blankets, but I've never seen these braided ones before. I'll have to give them a try. #SITSsharefest
ReplyDeleteI just made this and it's beautiful! I messed up my first one (it's fixable though) with the "fitted sheet" look a couple other people mentioned. My second one, I cut the strips 2 inches long instead of 1.5 and went slowly, smoothing out the fabric and not pulling so tight when I reached the corners. It also helped to have the two layers pinned together. This resulted in a perfectly rectangular blanket.
ReplyDeleteOk with the double layer fleece blanket with braded edge. Do ALL the fringes get used when you alternate between top fringe and bottem or are there fringes left out?
ReplyDeleteHi Natasha, All the fringes will be used when you're done.
DeleteHave not tried this yet but looks like an awesome idea. Think i want to try one of these to make a "sleeping bag" for my grandson. May make a larger one for myself as a sleeping bag liner for when I go camping. Seems like it would work if you only did the fringe braid on three sides. I plan to make some ties on the bottom end so he can roll it up and tie it for sleep overs. Lots of possibilities here
ReplyDeleteJust had a thought. Seems like several people have tried to use cotton or even silk fabric with this, with understandably less than successful results. I do lots of things with t shirts and tshirt yarn. Seems like you could maybe back this with tshirt jersey fabric. I plan to try this to make a pillow out of a tshirt. I live in an area with lots of thrift shops. I plan to buy a tshirt jersey sheet and experiment with this. Fleece and jersey might work
ReplyDeleteI discovered this tutorial over a month ago, and since then I've been making them non-stop!! I love doing it and they are super easy, everyone I know has gotten a blanket :) A cheaper alternative I've found is too buy polar fleece blankets from a store (can usually be picked up for under $5 each) and use that fabric to make a thicker and warmer blanket with a beautiful edge :) Thankyou so much for this :) I'm off to make one now :)
ReplyDeleteI am making a new sew blanket for my boyfriend this year. The pattern he wants only comes in cotton fabric. Could i still use this technique if I have a top cotton fabric and a bottom fleece fabric?
ReplyDeleteHi Kristen, I tried to email you, but your email didn't come through attached with your comment. Cotton WILL NOT work for this. Cotton fabric frays and has very little stretch to it. Fleece fabric doesn't fray and has some stretch which is what makes this method work. If you want to make a blanket with cotton, you'll need to use a sewing machine and sew around the edges to make a different kind of blanket.
DeleteThis comment has been removed by the author.
ReplyDeleteHi my name is Denise from Ontario, CA. I wanted to ask you can i use 3 fringes to make blanket thicker. Also thank you for your new idea the braid people seem to get bored with the same look all the time.i love it.
ReplyDeleteHi Denise, I don't think that using 3 layers and 3 fringes would work. In my experience the double layer of fleece is already quite warm, and 3 layers would likely be too thick.
DeleteI was so happy to discover this post! I recently made a blanket like this for a baby shower and the mommy-to-be loved it! Great tutorial, thank you!
ReplyDeleteThis is such a nice edge. I have been making "knot" blankets for years & now I have a new way to finish them. Am doing a baby blanket now using this edge! Thanks for an easy tutorial!
ReplyDelete