
I've tried out quite a few different pens with Faux Embroidery techniques and will continue to test them. I thought I'd give them their own post, so I can refer back here as I post more faux embroidery projects in the future.
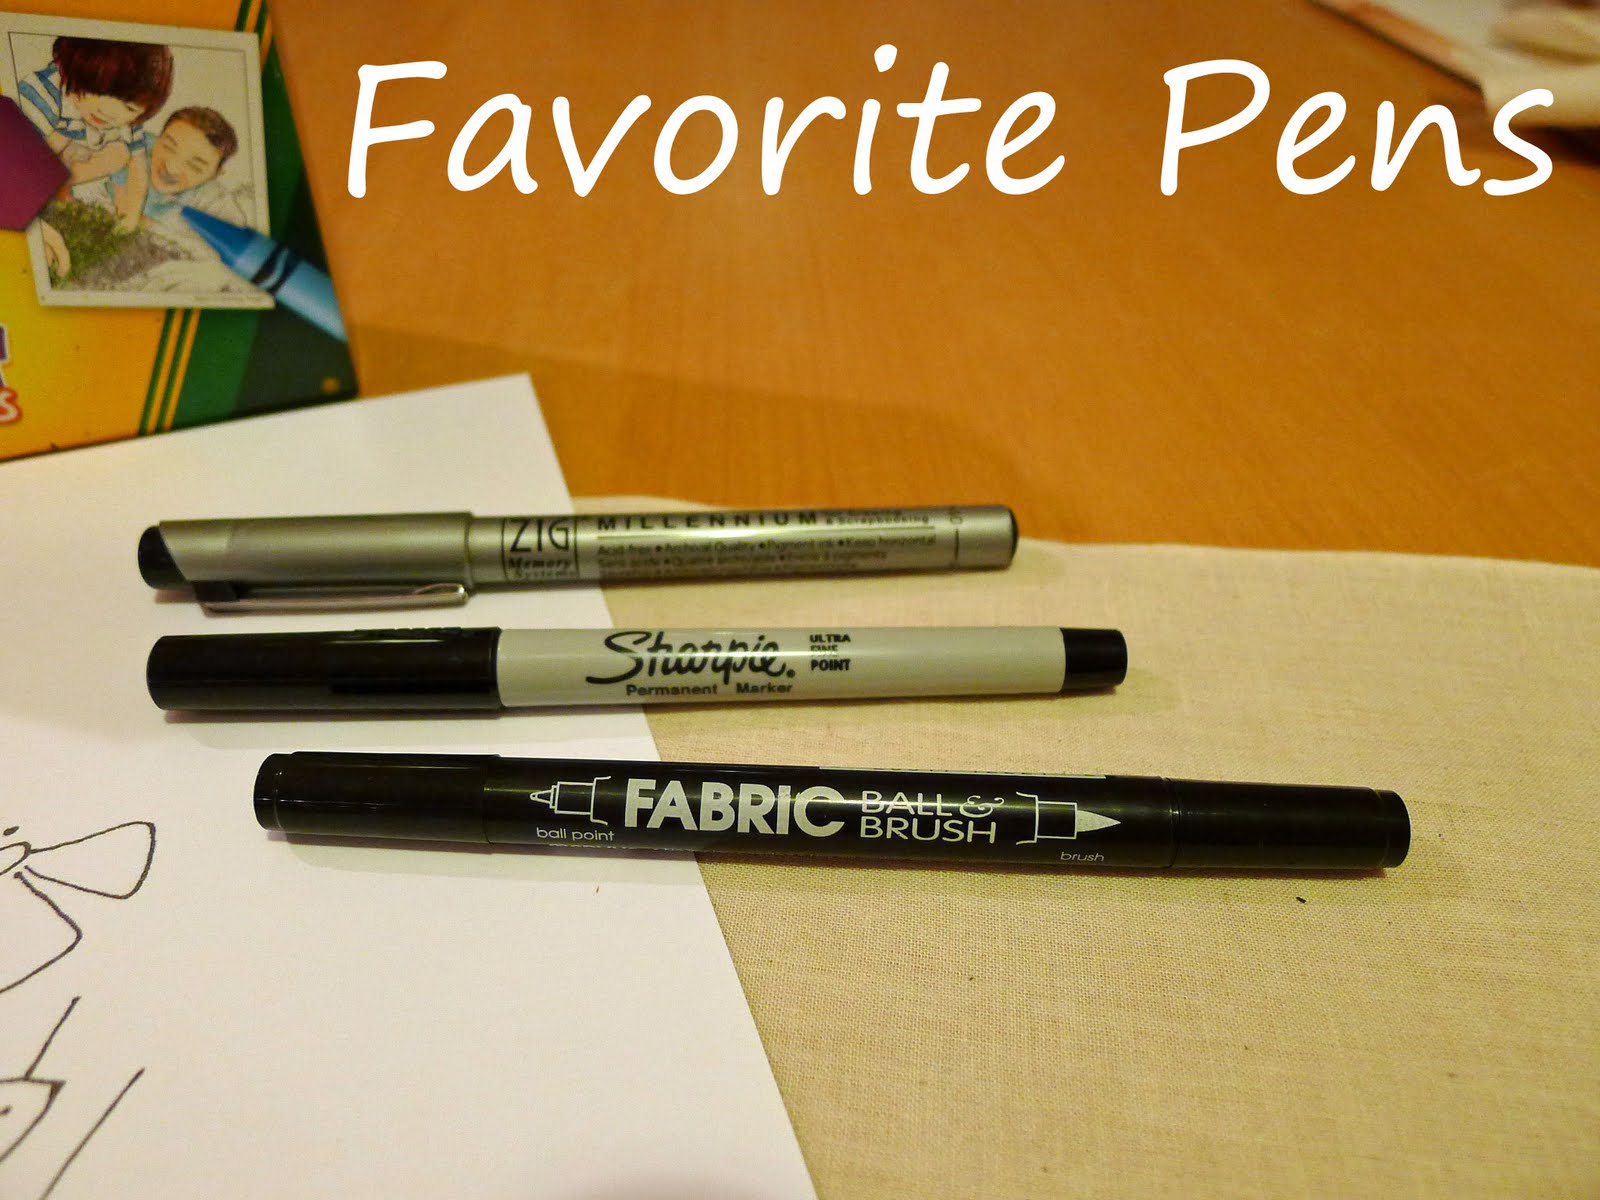
There are three main pens that I have used. My favorite all around pen is the Fabric Ball and Brush Pigmented Double Ended Fabric Marker by Marvy Uchida.
It gives a nice thin line, but it dark enough I didn't have to go over the line twice. The tip is smooth, and since it doesn't bleed you can work slowly and carefully. I bought mine in a color pack with my 40% off coupon at Jo-Anns. All you really need is the black one though, and it can be found here for under $3. I haven't tried washing these yet since all my projects have been framed, but the packaging says they are permanent with no ironing needed.
It gives a nice thin line, but it dark enough I didn't have to go over the line twice. The tip is smooth, and since it doesn't bleed you can work slowly and carefully. I bought mine in a color pack with my 40% off coupon at Jo-Anns. All you really need is the black one though, and it can be found here for under $3. I haven't tried washing these yet since all my projects have been framed, but the packaging says they are permanent with no ironing needed.


An Ultra-Fine tip Sharpie will also work, and has some advantages and some disadvantages. One advantage is that it may be the easiest to find at the store and is slightly cheaper. I used it for a different project on flannel that I'll be showing soon and it worked wonderful. The main disadvantage is that it bleeds more than the pigmented pens. You have to work quickly in your tracing or it will be bleed more than you want it to. In general it leaves bolder lines...which you may or may not like. I think the Sharpie works especially well if you're going to have a child color in the pattern because they're likely to color it in darker and the bold Sharpie lines will stand out more.

Before trying the Fabric Ball and Brush Pen, I used a scrapbooking pigment pen. It's the pen I used for the project for my daughters. I worked well, but I had to go over the lines twice in some cases. If you're going to buy a pen for this project, I wouldn't choose this one, but if you already have it on hand, then it can work well.

Here's a sample of how my three favorites performed side-by-side. This is demonstrated using Twin Stitchers "Get Crackin" pattern available here (or you can download it free this month (April 2011) on the Twin Stitchers sidebar.) The colored in circles were done using the brush tip of the colored version of the Marvy Uchida markers. The writing was done using the ball tip of the colored markers. (Click on picture for larger view.)

I also tried a couple of different laundry markers...and I just wouldn't recommend them. Their tips just weren't fine enough.
No comments:
Post a Comment
Thanks for taking the time to comment. I love hearing from you. I also love responding, so please make sure your Blogger account is set up for me to be able to see your email address or include your email address. I've had to stop accepting anonymous comments due to spam. If you don't have any other way to comment, you can always send an email.