
Yeah! It's finally here!

Seriously, I love, Love, LOVE these skirts and I hope you do too!
I think it's adorable when little kids wear "grown-up" fibers (denim, khaki, cordoroy, etc) that have been embellished just enough for their age, so reusing Mom's (or Dad's) pants and adding some cuteness works perfectly. This pattern is also super easy and has added cuteness since it reuses the original waistband!

Tiered Ruffle Skirts are very forgiving. The ruffles can be just about any width, and the rings can be different lengths as well. Each ring gets bigger than the one before it, so the skirt gets more full with each ruffle. You can adjust the measurements I've given here in any direction to better fit your child and they should still work. I did a tutorial several weeks ago using this method for a skirt for my 5-year-old. For that skirt, you have to make your own waistband. The waistbands for the two skirts could be interchangeable though.

Materials:
Fabric from old pants (I have used light cordory and stretch denim successfully.) Most pants fabric would work, but I would not try to use the thicker denim or thick cordoroy. (If you've got thicker denim that you want to remake into a skirt, Melissa on Until Wednesday Calls has some cute ones here and here.)
Elastic long enough to go around your child's waist plus one inch.
Thread to match your fabric
Sewing machine and other typical sewing equipment


I started by opening up the inside leg seam. (It doesn't matter which seam you open though, so whichever is the easiest.)
Note: For the directions for the 5 -year-old's skirt, you can see my first tutorial here. For my 5 year old's skirt, I cut an 8 inch strip and two 5 inch strips from EACH leg. The exact width of the strips is not super important. You'd want them wider for an older child or shorter for a younger child. The top and bottom ruffle will need to be the same width as each other, though, as you'll see in a bit. When you're deciding how wide you want the ruffle, remember that you'll need to add a couple inches to the top for a waistband (unless you're going to reuse the waistband from the jeans, as will be shown a bit later) and an inch to half inch to the bottom depending on how wide you're going to make the hem.
For my 12 month old's skirt, I cut a 6 inch strip from EACH leg, as well as a 3 inch strip from EACH leg.


I also cut the waistband off the pants. Make sure to leave a half inch or so of below the waistband for a seam allowance.

You'll probably have to to a little seam ripping to undo the bottom of the belt loops. You could take them off entirely, but I thought they'd be cute, so I just unattached the bottom and resewed them onto the skirt when I was done.
Since I started this at my inlaws' house, I used my mother-in-law's serger to serge around the edges to prevent fraying. You don't need a serger, though. Somehow the three inch strip didn't cut out until I was back home, so I just went around the edges with a zig zag stitch as you can see in the next picture below.
Sew the two 6 inch strips RIGHT sides together on both ends, so they make a circle. (Mine was about 44 inches around, but the exact length is not important.
Sew the two 3 inch strips RIGHT sides together on just one end. We want this circle to be smaller than the 6 inch strips, but bigger than the waistband. In my case, I trimmed it, so all together it was about 26 inches.
Once you've trimmed this strip, sew the remaining side together to form your circle. After I sewed the strips to form the circle, I also zig zagged the edges of those seams to help stop fraying.

Measure your baby's bum (with their diaper on) at the widest point and add 1 inch for seam allowance. (For my baby, this was about 20 inches + 1 inch, for a total of 21 inches, so I cut a 21 inch piece of the waistband.
Then measure your baby's waist (about at the level of their belly button) and add 1 inch for seam allowance and cut that much elastic. For my baby that was about 18 inches + 1 inch for seam allowance. Put a large safety pin on the end of the elastic to help thread your elastic through the open space in the waistband.
Now, I would hem the bottom of the skirt. Since my piece had been serged, I just folded it up once (about 1/2 inch) and ironed and pinned it. If you have raw edges, you'll want to fold it twice.

I chose to use green thread for my hem as a bit of a decoration, but you may want to use matching thread.

I sewed two lines of stitching to help it lay really flat, but only one line of stitching is necessary.

You could also sew the hem by hand...but I try to avoid as much hand sewing as possible, just because it takes a long time.
I also chose to add an applique to the skirt before sewing it all together, so there's be less material in the way. You may want to embellish your skirt now, leave the skirt plain, or embellish it when it's finished. You can get the Free Very Hungry Caterpillar Applique Pattern and Directions here. I also have a Cupcake Applique Pattern and I'll be adding other free applique patterns soon.
This is approximately what pieces you should have by now. You'll notice that because there was some flair to my jeans, the skirt has a bit of a flair to it as well. It works well with or without the flair. Straighter edges are a bit easier to hem, so you can trim that flair out before sewing the sections together if you want.

You doing okay? Great! Now let's assemble the skirt. We'll start with the waistband. Put a big safety pin at one end to help you thread the elastic through the waistband. There should already be a casing there for it sewn into the orignal waistband of your pants. (You might have to remove a label or two though.)


Pull the elastic through until both ends of the elastic are lined up with the ends of your waistband.

Then sew to secure the elastic inside the waistband.

Then I trimmed the elastic that was inside the seam allowance, but to reduce the bulk.

Then bring the ends of your waistband together, and stitch RIGHT sides together, with about a half inch seam. Press open and sew the seam allowance against the waistband. Fold your waistband into quarters by folding it in half and in half again and mark the quarters with with pins. Now set aside the waistband for a bit while we get the other pieces ready.

At the top edge of each of the other two pieces(The 3 inch loop and the 6 inch loop) , we need to put some gathering stitches in. I'll give you some quick directions for it, but if you want more detailed ones, you can see my sister's post for gathering here (just scroll down to the part on gathering). Before doing any stitching fold your pieces in half and in half again and mark the quarters with pins. Then I did one set of gather stitches for each half of the skirt. (So that's 2 sets of gather stitches. Set your sewing machine, so it has the longest possible stitch length. Do NOT go back and forth to secure the end (because you'll be pulling on one of those threads) and leave a LONG thread hanging out on both ends. (My sister recommends doing two or three lines of stitching for each gathering set...I was lazy and just did one, but you do get a nicer result with 2 or 3.)

Then you'll pin the 3 inch wide loop to your waistband, matching the quarter markings. Spread the puckers out...they'll start out uneven like this...

And you want to spread them out until it's evenly gathered. Be patient with the gathers and go slowly. Especially if you're using stretch denim that is on the thicker side, you want to be careful not to break your threads. You want to pin this REALLY well. I wished I'd used abotu twice as many pins because I ended up with some funny puckers in a couple places that I had take out and redo. (Doing multiple lines of gather stitches as shown in my sister's tutorial will also help with this.)

Then stitch. You'll want to do this on the waistband side and stitch right next to the waistband.

Sew the bottom of your belt loops onto the skirt.

Then check for any funny puckers. If you find any, you'll need to use a seam ripper on just that part, even out the gathers again, and restitch.
Then repeat the gathering process for the bottom ruffle of your skirt.

And it's ready for your little one to play...


(If you like that awesome fabric ball, my mom has an easy tutorial for them here.
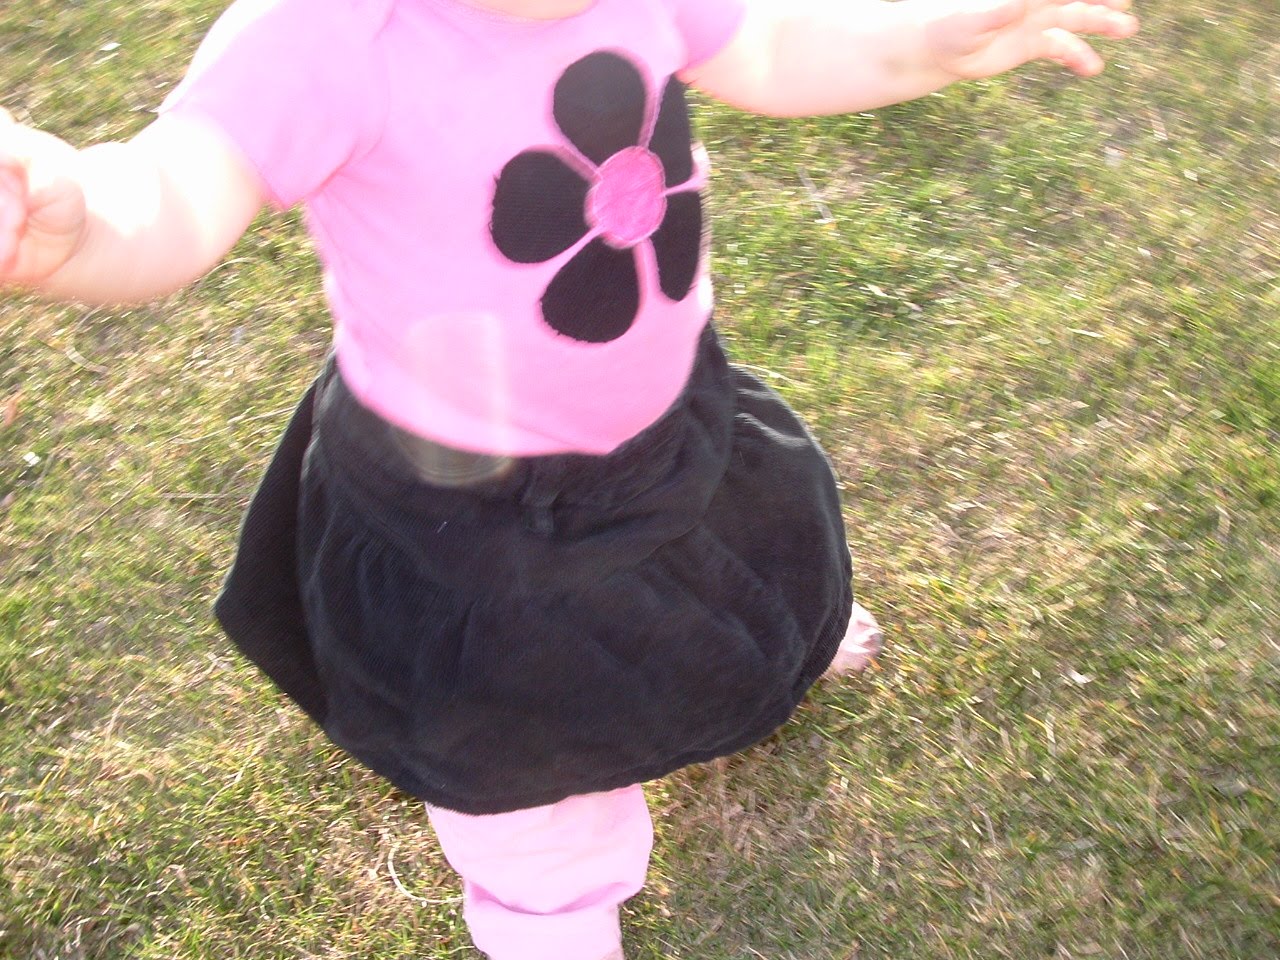
I just love how this little waistband looks around Sweet Pea's little tummy.

You can find the pattern for the cupcake onesie here, and the free flower applique pattern for this matching onesie can be found here. Wouldn't those petals be cute in denim?!?

More cuteness...


And I just love how it looks when she bends over too...


adorable!! I just made my daughter a jean skirt, I wish I would've seen this before I made it.. maybe I'll make another :D
ReplyDeleteThe skirts look great! And what adorable little models you have :)
ReplyDeleteI loved it! Thanks for sharing!
ReplyDeleteI have a great interview with a savvy blogger on my blog right now with great tips on how to help your blog grow.
You can check it out at http://bloggerchixdesigns.blogspot.com/2010/04/aprils-featured-interview-april.html
Also a giveaway for a Trendy Diaper Changing Pad if your interested :-)
These are absolutely darling! Thanks for sharing the tutorial.
ReplyDeleteLOVE this idea... I just made myself a maternity skirt from some trouser jeans and have a couple of panels of denim left over- now I know exactly what to do with it!
ReplyDeletecan't wait for you to link up this week... :)
ps- I love your hand-me-down-rehab idea... fabulous!
Great tutorial - and thanks for the links to Katie's post about gathering stitches!
ReplyDeleteThose are adorable and so are your cute little models!
ReplyDelete☺ Celeste
That is adorable! Great way to use old jeans!
ReplyDeleteVery cute! I need to try and make some of those for my daughter. We're always giving jeans away, but now I know to keep them and make this!
ReplyDeleteStop by my blog for a fun spring block give away! Have a great night! alittleknickknack.blogspot.com
The skirts are adorable, as are your girls.
ReplyDeleteI realy love how you put a hole in the cupcake! Nice touch.
THanks for linking up with Sugar and Spice.
Kim
Coming over from 733! Adorable!!! I want to make one of these for my daughter. I would love it if you linked this up to my party today at somedaycrafts.blogspot.com!
ReplyDeleteI'm a new Follower From Thursday's Treasures Link Party! Visit me at http://www.rockindeals4you.com/?p=1398 and sign up for my newest giveaway!
ReplyDeletegreat tutorial! I love it! I need a girl SOO bad!
ReplyDeleteTHanks for linking up! I am featuring this at somedaycrafts.blogspot.com. Grab my "featured" button.
ReplyDeleteWow! They turned out so cute! Now I have something to do with those jeans except just store them in a box. Thanks. This is a great tutorial.
ReplyDeletevery very cute!!!
ReplyDeleteWow! I love this! You have an awesome tutorial here, too. Love the Hand Me Down Rehab theme!
ReplyDelete